

 English
 中文简体
中文简体 عربى
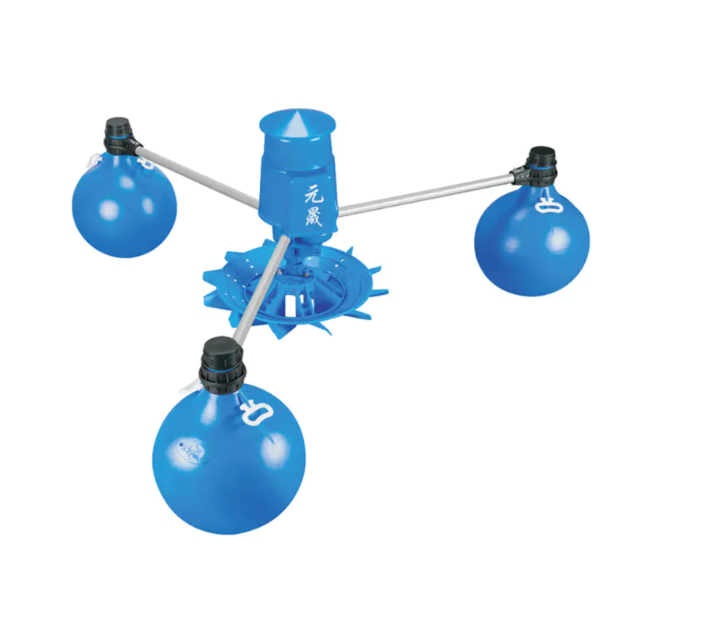
عربىIn many ponds, a Diy Paddle Wheel Aerator looks simple at a distance. A motor turns a shaft. Blades hit the surface. Water moves, and air seems to mix in. Because of this simple appearance, many people decide to build one on their own. Some succeed. Others end up adjusting the same machine again and again, trying to understand why it never feels quite right.
The problems rarely come from one major flaw. More often, they grow from small decisions made during the build. A material that seemed convenient. A layout that looked balanced on paper. A mounting point that felt "good enough." Over time, these choices begin to show their effect.
The following sections walk through the mistakes that appear most often. Each one reflects situations seen in real use, not theory alone.
Is the Wheel Design Too Basic to Work Properly?
A common starting point is a round frame with evenly spaced flat paddles. It looks neat and easy to assemble. Yet once placed in water, the behavior may not match expectations.
Flat paddles tend to push water more than they lift and break it. Instead of creating a lively spray, they produce a heavy, rolling movement. The surface shifts, but the mixing effect feels weak. In some cases, water is simply pushed in one direction without much air entering.
Another issue appears when all paddles are identical but not carefully aligned. Even a small difference in angle can change how each blade meets the water. One side may hit harder, creating uneven force. Over time, this leads to vibration. At first, the vibration is mild. Later, it becomes a constant shake that affects the entire frame.
Some builders try to fix this by tightening bolts or adding weight. The real cause, however, sits in the original shape and placement of the paddles.
Do Material Choices Hold Up Over Time?
During construction, available materials often guide decisions. A piece of plastic from one project, metal bars from another, maybe some treated wood for support. At first, everything seems solid.
After weeks of use, differences begin to appear. Wood that stays wet starts to swell slightly. When it dries, it shrinks back. This repeated change can loosen connections. Plastic parts exposed to sunlight may become less flexible. Small cracks form near edges or around fasteners. Metal surfaces, even those that looked clean, may show early signs of rust where water collects.
The problem is not only the material itself. It is how different materials react together. A rigid metal shaft connected to a softer base can shift its position. A plastic blade fixed too tightly may develop stress points.
A simple comparison helps illustrate this pattern:
| Part Area | Typical Choice | What Happens Later | Result in Use |
|---|---|---|---|
| Blades | Thin plastic | Edges bend slightly | Uneven splash |
| Frame | Mixed metals | Surface changes over time | Reduced stability |
| Support base | Wood | Shape shifts with moisture | Alignment drifts |
| Bolts | Standard steel | Surface wear appears | Harder to remove |
These changes do not appear overnight. They build slowly, often going unnoticed until performance drops.
Is the Motor Setup Creating More Problems Than It Solves?
Getting the wheel to rotate is only one part of the task. How it rotates matters just as much.
Some setups run faster than needed. The water is thrown outward in wide arcs, but the contact time between blade and water becomes short. This reduces the mixing effect. The surface looks active, yet the deeper layers remain still.
Other setups move too slowly. The blades dip into the water and come out with little disturbance. The motion feels gentle, almost calm. While this may look controlled, it does not create enough movement to spread oxygen through the pond.
Mounting also plays a role. If the motor is fixed on a surface that shifts slightly, the shaft may not stay in a straight line. This creates friction. The sound changes first, then the movement. Over time, parts begin to wear unevenly.
Some builders notice the issue only after repeated use, when the machine no longer runs as smoothly as it did on the first day.
Does Placement Limit the Effect Across the Pond?
Even a well-built aerator can underperform if placed in the wrong spot. One of the most common mistakes is setting it too close to the edge. In that position, water is pushed along the bank instead of across the pond.
The result is uneven circulation. One area becomes active, while another remains still. Fish may gather where movement is stronger, leaving other zones quiet.
Another pattern appears when more than one unit is used. Without planning the direction of flow, the currents may collide. Instead of forming a gentle loop, water pushes against itself. This creates pockets where little movement occurs.
Depth adds another layer. If the paddle only touches the top surface, deeper water stays untouched. The difference may not be visible at a glance, but it affects how the pond behaves over time.
Are Support Structures Built to Last?
At the beginning, the structure holding the aerator often looks firm. The frame stands straight. The platform feels steady. Once the wheel begins turning day after day, small weaknesses start to show.
A frame that bends slightly with each rotation may not fail right away. Instead, it shifts little by little. Bolts loosen. Connections that once felt tight begin to move. The change is slow, which makes it harder to notice.
Floating platforms bring their own challenges. If weight is not evenly distributed, one side may sit lower in the water. This changes how the paddle enters and exits the surface. The effect is subtle at first but becomes more noticeable as time passes.
Strength is not only about using heavier materials. It is also about how those materials are arranged and connected.
Why Do Maintenance Needs Get Ignored?
When the aerator finally runs, attention often shifts elsewhere. The system is working, so it feels complete. Maintenance becomes something to think about later.
In daily use, small things begin to gather. Bits of debris wrap around the shaft. Water leaves residue on surfaces. Bolts that were tight during assembly may loosen slightly under constant motion.
These changes do not stop the machine right away. Instead, they reduce its efficiency step by step. The wheel may still spin, but not as smoothly. The splash may look similar, yet the pattern shifts.
Without regular checks, these minor issues combine. By the time they are noticed, more effort is needed to fix them.
A short inspection routine often makes a difference. Even a quick look at key points can reveal early signs of trouble.
Are Environmental Conditions Being Overlooked?
Outdoor equipment does not operate in a fixed environment. Wind, temperature shifts, and water conditions all play a role.
Wind can push the spray in one direction, changing how water circulates. A strong breeze may even send water back toward the wheel, reducing forward movement.
Temperature changes affect materials. Parts expand and contract, especially when exposed to sunlight during the day and cooler air at night. Over time, this can loosen connections.
Water itself also varies. Some ponds contain more organic matter. Others are clearer. These differences affect how quickly buildup forms on moving parts.
Ignoring these factors often leads to confusion later. A system that worked well at first may behave differently as conditions change.
Do Small Details Get Overlooked During Assembly?
Many issues trace back to details that seemed minor at the time. A bolt tightened just enough. A blade placed slightly off angle. A joint that felt secure without further checking.
Each of these choices appears harmless. Together, they shape how the aerator performs. A slight imbalance can lead to vibration. A loose connection can shift under repeated motion.
These effects do not always appear during initial testing. The machine runs, water moves, and everything seems fine. Only after longer use do the differences become clear.
Builders who take extra time during assembly often notice fewer problems later. Care at the beginning reduces the need for repeated adjustments.
What Patterns Appear After Extended Use?
After weeks or months, certain patterns tend to repeat. The wheel may begin to wobble slightly. The sound of the motor may change. Water movement may look less even than before.
These signs point back to earlier decisions. Material choices, alignment, placement, and maintenance habits all leave their mark. None of them act alone. They combine over time.
In many cases, the solution is not a complete rebuild. Small adjustments can restore balance. Tightening connections, repositioning the unit, or replacing worn parts often brings noticeable improvement.
The process of building a paddle wheel aerator rarely ends with the first successful run. It continues through observation, adjustment, and gradual refinement.